Extensions - Advanced Settings
Extensions or Telephone Accounts are a key part of the hosted telephone network. This section allows you to set up new telephone extensions or SIP trunks for those who still wish to use legacy telephone systems.
Go to Features - Extensions within a customer's account. Here, you will find any telephone extensions that have already been set up or telephones that were set up via the Add wizard in the very first section of this user guide.
 |
| To add an extra Telephone Extension, click ‘New’ in the bottom right-hand corner. Once you have done this, you will be presented with this screen. |
| There are some statuses of the extensions to help identify any issues or the current status of extensions. |
| Remember | This is only as current as when you first viewed the page, the information is NOT live. |
|
|
Indicates that the current extension is not registering to the servers. The information on the left will show when it last registered to help identify when the issue may have happened. |
|
|
This extension is registering and also has information to the left to show what device is registering and lasted registered. |
|
|
Extension is in do not disturb |
|
|


If you want a quick start, there isn’t any need to change anything on this page. However, you could look at what each option offers for an advanced setup.
|
|
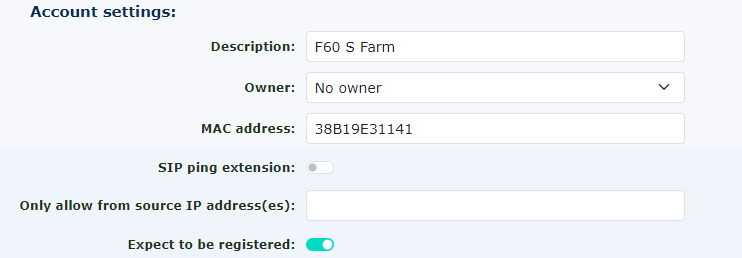
Account Settings Telephone Number and Username |
| This can all be left as default. However, it is recommended that you populate the Emergency location callerid. |
|
|
|
We recommend using the system-generated password for the Extension. When using the auto-provisioning, it will populate all the details for you.
Don't forget to click save. |


Below is a full, detailed explanation of all the settings within an Extension

Status:
This will allow you to see instantly if the extension is registered and the last call the telephone has made or received. It can also provide helpful information about the handset registration.
 |
|
Account Settings
|
|
Extension Settings
|
Rate Plan for Outbound Calls If the Extension is part of a call record bundle, it will show here. To add it to the call record bundle, visit the call rec bundles and add it there. |
|
Available in Hunt Groups |
Send Called Number as Request URI Mailbox for Message Waiting Light and Automatic Voicemail Access |
|
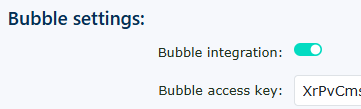
Bubble Settings This option will appear only if Bubble & MobeX UC integration is enabled in the customer settings.
To activate the Bubble screen pop-up and CRM integration services, please follow these steps: Go to Bubble settings, select Yes from the dropdown, and click Save. Please perform these steps for each extension requiring CRM integration and follow the instructions in the Bubble manual for further guidance.
|
|
|
Dial Plan |
Screen Calls If this is changed to ‘Yes play Caller ID’, it will play ringing to the caller, and when you answer the phone, it will tell you the Caller ID. You can also ask the caller to record their name, and it will play their name for you, too. This is whilst the caller is listening to the ringing. If you then want to accept the call, press 1. Our recommendation is to leave this set to ‘No’ or Unchanged (default to no) Ringing For This is an important setting. It controls how long the telephone rings before going to Voicemail. We have set the default to 20 seconds, but you can choose from 5 seconds to 1 hour. Password This is another critical setting. We recommend leaving this as the randomly selected password we have given you. Please do not make all the passwords for all the telephone extensions the same. This will make it very easy if your customer gets hacked and one of the passwords is compromised. Keep it as long as suggested. You don’t need to remember this; it will be auto-provisioned if you use our provisioning system. |
|
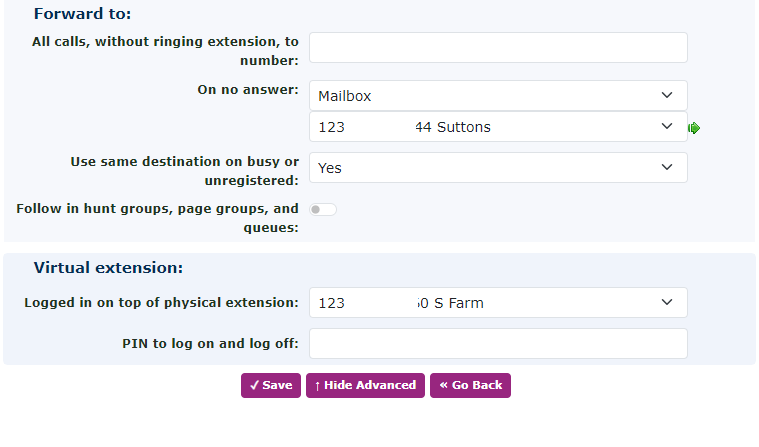
Forward To |
On Busy Virtual Telephone PIN to Log on and Log off |


Other Options for this Telephone Line:
Call History
It will take you to the call history report, which you can pre-set with the details of this telephone extension. See the Call History reporting section for more information on running a report.
Hunt Groups
You can change the Hunt Groups to which this telephone extension belongs.
Make Copy
Create a new telephone extension with some of the settings from this telephone.
Missed Calls
It also allows you to search for missed calls. It will show calls you never answered in a Hunt Group that someone else may have.
Notes
Sort notes about telephones. This is a great place to put old handset MAC addresses if you are changing handsets for a customer.
Queues
Edit the Queues this telephone belongs to and select whether you want the handset to be available.
Registration History
You can see a more detailed view of the handset registration history. This is an ideal place to see if the handset is registering regularly. It is also helpful to see if a customer's firewall is blocking the registrations.
Speed Dials
It works the same as the system speed dials, but this is just for this single handset, allowing you to create personal speed dial numbers.
Web Notify
Used to inform a URL that this telephone has received a call.
Provisioning Settings
One of the easiest ways to set up many handsets is to use the auto-provision function built within the platform. This isn’t just used for the one-time setup of the handset but also for administering changes throughout the life of the telephone handset. It also significantly reduces the time it takes to maintain handsets. It offers clients hot desking and features like DND sync to the telephone platform. Several handsets are supported either as a fully supported product, like the branded hosted handset and the Yealink range of handsets or partly supported, giving basic provisioning for handsets like the Snom range.
Provisioning per Extension
|
|
Status provides you with some information about the status of the handset if any have been registered already. |
|
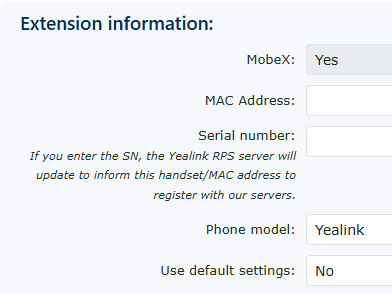
MobeX This allows you to enable the MobeX software for the extension. You need to enable MobeX software for this to show as yes. It is for information only to show you have the enabled licence on. MAC Address This can be entered here, or you will see the entry on the main extension page. This will allow the handset with this MAC address to pull all the current provisioning information for the handset. It will also use this to sync with the system. Phone Model This will be auto-populated from the main extension page. If you are entering the details here for the first time then as you select different supported models more options may appear as below. |
Use default settings. If set to yes, it will use the default provisioning set out in the default customer provisioning. If set to no, then it will open more options for you to create bespoke provisioning for this handset only.
For Yealink settings see below in our Yealink section on these pages |
|
|
You can enter more extension details here if you wish to have more than 1 account on your handset. You can then allocate this account to a button on the handset using the BLF (busy lamp field) programming below. It is normal to only have the main account on here, but devices like DECT cordless handsets, this allows you to program multiple accounts to 1 base station. |
|
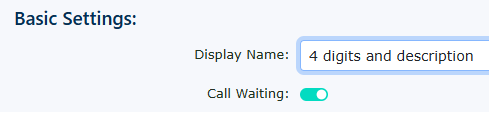
Call waiting If the handset supports it, you can enable and disable the call waiting feature on the handset. |
Display Name You have a choice to display 4 digits only ( last 4 digits removing the customer prefix) 4 digits and description (4 digits and phone description) 9 digits ( full extension number including customer prefix) Internal caller ID, this could even be a feature code Phone description to just show the name |
| You can change any of the settings, and if your handset supports our auto-provisioning, the settings will become the default for this particular handset. |
|
|
|
You can also change any of the volume settings on supported devices. |
|
|
This will allow all handsets to use the LDAP cloud phonebook. Please enable the cloud phonebook under features advanced > cloud phonebook and populate all numbers required here. |
|
You can preset the ring tones on the handset for internal ringing between handsets and incoming external calls. This helps identify the type of inbound call to the handset before it is answered. |
|
|
|
MobeX BLF Enabling MobeX BLF presence will display the below BLF buttons in the layout below. If set to no then the extensions will be listed in numeric order. Extended buttons This will allow extra buttons to allowed to be added to remove any restrictions by any handset button limitations. Enable callerid selector This will enable the ability to choose a different caller ID when ring out. If this is set here in global customer provisioning, it can be overided under the extension provisioning. |
|
BLF provisioning Can be changed from disabled to custom settings. Disabled removes the ability to provision BLF buttons at the bottom of the screen. Custom settings allows you to create a BLF button layout for the whole of the customers handsets and MobeX devices. BLF Idle LED This will show green when a device is plugged in and registered to the network. This will light the handset up like a Christmas tree if there are a lot of BLF keys. My recommendation is to leave it off, and it makes it easier to see and better for anyone who is colourblind. |
|
|
|
Leaving blank will allow handsets to be provisioned from any IP address, but if you want to add extra security you can lock down the provisioning to particular IP addresses. This helps with anyone trying to request provisioning details from an unknown IP address. |


|
|
|
Selecting the custom settings under BLF settings ‘BLF Provisioning’ will allow you to add buttons at the bottom of the page. These buttons will auto-populate on to a branded hosted handset and/or MobeX if you use the MobeX web desktop or MobeX+ mobile app. We recommend not showing the BLF idle LED, leaving this set to ‘No', and leaving the monitor with your own extension set to ‘No’. This is because it stops your handset from lighting up with lots of lights and informs you that the handsets are plugged in and ready to receive calls, which in most circumstances are not required. The lights used on a handset to show status are generally red and green. Green shows that the handsets are available in the case above, and red shows that a user is busy. Some people are colourblind, making it impossible to see what is happening with the BLF when this mode is in use. Not selecting to monitor your Extension means it will not populate a button on your handset, freeing up a button to be used for another telephone Extension. |
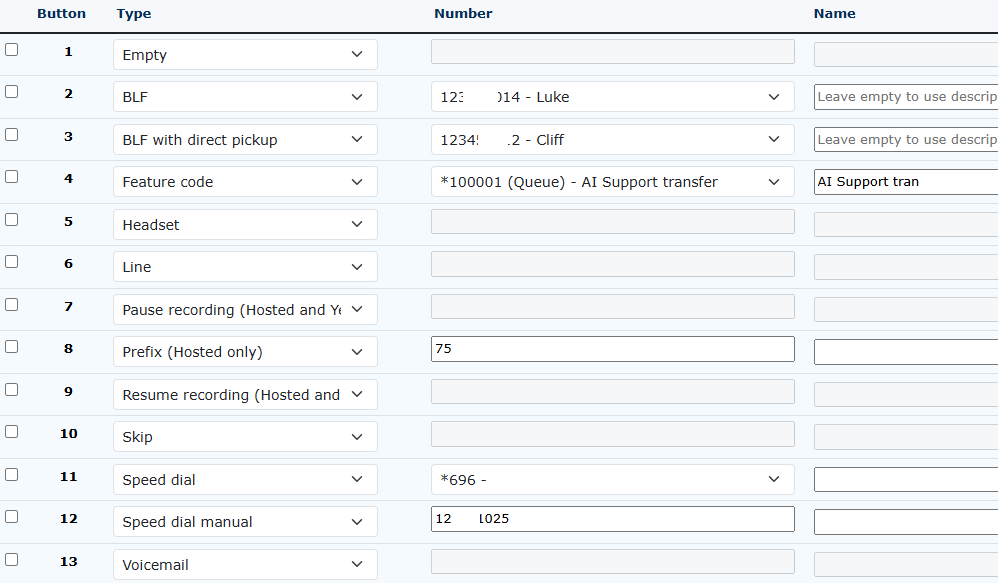
| This will simply leave the button/key unprogrammed. This could be useful if left to the end user to program themselves. |
|
|
|
The Busy Lamp Field option lets you enter the extension you want to monitor. You can see the status of the extension when it is ringing, on a call (busy), idle or in a function like do not disturb (DND) |
| The same as the BLF/busy lamp field, but with the added advantage of being able to pick up the call directly when the monitored phone is ringing to take control of the call. |
|
|
|
This will perform whatever function is configured for the feature code number. This will also create an icon on the BLF keys/Presence keys of the MobeX suite of software. |
| Creates a button to switch between the headset and the handpiece for audio. (Some handsets have these as a default button and therefore may not be needed. |
|
|
|
If you have multiple accounts you wish to access from the provisioned handset, you can select which lines you would like to see on any of the buttons. |
| Enables a Pause of the recording if the extension is being recorded. |
|
|
|
Enables a resume of the recording if the recording was paused above. |
| Allows a prefix code to be dialled and displayed before dialling the extra digits, like a telephone number. |  |
|
|
This will leave whatever is already under the button, and no provisioning will be sent from the portal. |
|
This uses the speed dials from within the portal. It allows for a quick one-touch dial-out on a key. |
|
|
|
Similar to speed dials, but these are programmed directly here. |
|
Adds a key button to access your voicemail. Most handsets have this as standard, so it may not be required. |
|


Drag & Drop Buttons
|
You can click and hold your cursor to drag and create the required layout order.
To rearrange the layout, click on the button's number and either drag it up to move it to a higher position or down to move it to a lower position. |
|

|
|
From here, you can copy settings from another handset, copy the default settings to get you started, or completely customise this Telephone extension. |
|
There is now a facility to test whether the handsets connect and communicate through the customer's firewall. The test could help identify if the firewall is too restrictive and blocking some of the ports required to operate a VoIP handset on their network |
|


Yealink settings
|
If you choose to use the provisioning server to program a particular extension, you can take control of almost any Yealink device if you know the credentials. Changing the phone model to Yealink will open an extra box for you to enter the serial number as well as the MAC address. These details are used to inform the Yealink provisioning server that this server will take control of the provisioning. Each time the handset is rebooted, it will contact the Yealink provisioning server, which will then redirect the handset to this server.
You must have the correct serial number and the MAC code for the handset. If any details are incorrect, the server will not redirect the device. Please ensure that you enter the correct details or remove them if you no longer want the provisioning server to manage the provisioning of this handset. |
|
|
|
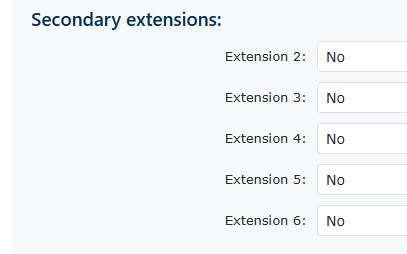
You can enter up to six accounts on the handset when setting up a DECT cordless device. These will become the extra accounts that you link to the DECT cordless on that particular base. It uses the first extension number as the default provisioning for all the other extension numbers in this list. Meaning that any settings changed here for the default provisioned handset extension will carry across the additional 6 extensions if you choose to put them here under this provisioned extension. |
|
Under the basic settings, you can choose to display the 4-digit extension number and the description, just the 9-digit extension number, internal caller ID or the phone description.
Call waiting can also be toggled on and off. |
|
|
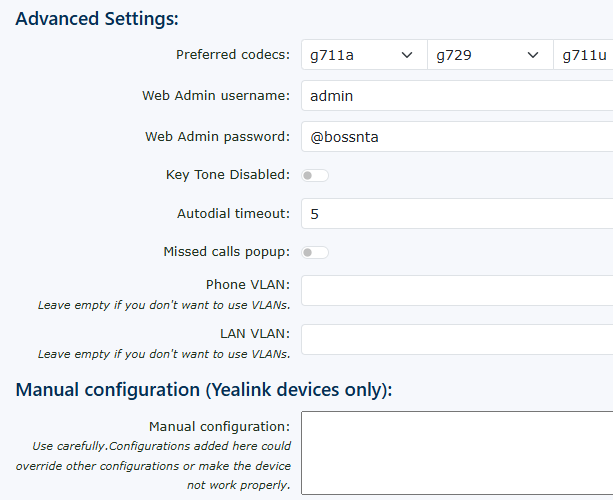
preferred codecs The preferred codecs can be selected here, along with the order in which you wish them to be used, with the first having a higher priority than the third. You can choose from g711a, g711u, g722 and also g729 Web Admin username The web admin name can be changed here, so that anyone trying to log in from the IP address will need to know the new username. Web Admin password The same goes for the Web admin password. If this is changed, which is a good thing to do by default. Again, this will stop anyone from just logging in to the handsets and changing any settings they like. |
The advanced settings for this handset can be chosen to.
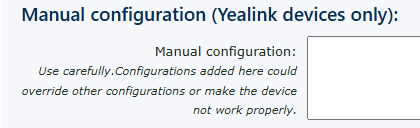
Key Tone Disabled This will remove the comfort tone you hear when pressing buttons on the handset. Autodial timeout This is the time the handset will wait before dialling the number displayed in the handset's display. This is ideal for people who are not accustomed to pressing send or call after finishing dialling the number, as you would with a mobile phone. Missed call pop This is handy if you want to see any calls you have missed, but can be very annoying if you are receiving calls from a hunt group or a Queue, as there will be many calls answered by other people, leaving you with lots of calls that you would not have missed. Phone VLAN You can set the phone VLAN you would like to use. LAN VLAN You can set the LAN VLAN settings you would like to use. Manual configuration (Yealink devices only): Only use this section if you do know what you are doing. It will override any of the configuration settings above. Adding settings here may cause unusual behaviour of the handsets if the settings are entered incorrectly. If you have any issues, reset the handset and start again. |
|
Manual configuration of a Yealink device is only recommended if you are comfortable with understanding how the configuration files work. This uses an XML-type file to send up a bespoke configuration for this device. It will override any settings that have been provisioned above if you choose to make these setting changes.
This can be used if you want to upload a picture to the device to appear on the screen in standby mode. |
|
| The remaining settings on the right-hand side follow the exact instructions as those provided above in the provisioning section. |