People - Microsoft single sign on - SSO
Microsoft single sign on or better known as Microsoft SSO can be found under Features, then People.
Please Note: If you enable Microsoft SSO, MFA will be disabled for the user account on the portal.
Setting up as the End User
|
As the end user, they can log in to the portal [if they already have portal access] Go to Features > People, select their own account, Then add their Microsoft username in the“Account Linking” section |
|
|
Once enabled for the user, you can see the Microsoft logo showing next to their username: |
|
|
When you then go to sign in to the portal, select the “Sign in with Microsoft” button. |
|
|
Enter your Microsoft account and click next, |
|
|
then enter your Microsoft account password and click “Sign in” |
|
|
You will be prompted to enter an authentication code |
|
|
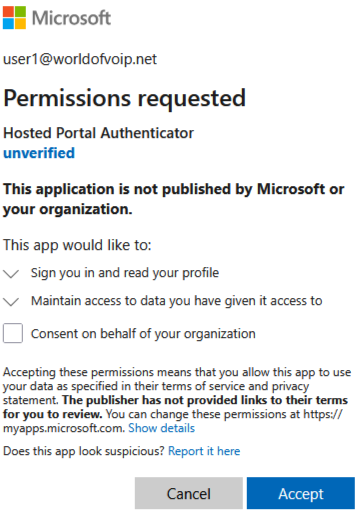
You will be prompted to allow permissions, click Accept and this will sign you into the portal.
Please Note: If you tick the box for “Consent on behalf of your organisation” this prompt will not show again. |
Setting up a user via the Administration manager
Microsoft Single Sign-on, also known as Microsoft SSO, can be found under Features, then People.
Please note: If you enable Microsoft SSO, MFA will be disabled for the user account on the portal.
|
After clicking on People in the Features menu, you will see a list of users. This is provided that you have Administrative rights to proceed this far. |
|
|
Some small icons indicate what users have enabled on their account login. This is the Microsoft SSO icon. You can also hover your mouse over the icon to view the linked account username. |
|
|
To enable a user for Microsoft SSO, the administrator can log in to the account details under the 'People' section the name of the user you wish to change. Then, on the right-hand side of the screen, click on the 'Account linking' section. Here, you enter the email address of the Microsoft user you wish to link to this account.. It is essential to note that when adding a service to an existing account, it is necessary to update the current login details for security reasons. The user can always perform a lost password to reset it. |
Don't forget to click 'Save' at the bottom of the page, located on the left-hand side. |


