
Queues
Queues are a great way to control high volumes of calls around an office where' agents' are available to answer. Using a queue can assist the person calling the company and the company answering the calls. It will help streamline calls by distributing them amongst the agents (staff) and allowing them to answer effectively and efficiently.
To set up a queue, go to the menu and select Features - Queue

Queue Settings
Name
Enter a name that will indicate what the queue will be used for.
Description
If you need more information about the queue, you can enter it here.
Priority
If you have more than one queue in operation. You can choose which queue should have the calls delivered first. If set higher, this queue will take priority over other queues, so the agents in this queue will receive calls above calls going into another queue first. You could use this as a 'Sales' queue, which could take priority over a 'Support' queue.
Destination Priority Order
There are multiple options for this function. The default is ‘always start at the highest’, which ensures calls are delivered evenly. The other options allow the queue to operate more like a Hunt Group.
Destination Order Within Priorities
The default is ‘ring least recently called only’, which will help distribute the calls evenly. The next option is similar; however, it adds priority to the agents with a higher priority. Finally, the last option will ring all destinations at once and turn the queue into a Hunt Group.
Request Extensions to Auto-Answer
This is not recommended unless the agents are using headsets, as the calls presented to the agent will be answered after 1 second.
Ring Destinations For
This is the amount of time the available Telephone will ring. It shouldn’t be set too high, as an agent should always be available to answer a call when they are logged in.
Allow Destinations to Forward Calls.
This will allow Telephone Extensions to forward calls while being part of a queue. However, this can make it hard to follow the flow of calls being answered, so our recommendation is not to allow this unless necessary.
Screen Calls
If you have external numbers as the destination for the agents, the screen calls option will allow the agent to hear the following:
1 - play the Caller ID of the caller.
2 - ask the caller to record their name.
If you use desk VoIP phones, the Caller ID will already be displayed on the handset, and screening will not be required.
Record Group
This option will be available if you have already set up record groups. Select the record group to which you wish your calls to be recorded.
Call Rec Bundle
If you have a call rec bundle enabled on this queue, you will see the group the queue has been set in here. To add it to a call rec bundle, you must go to the call recording bundles and set it there.
Music On Hold
Here, you can select different types of Music On Hold (MOH) for the caller to hear. This is an excellent way of playing the caller's information or perhaps an advert about the company or products.
Play Message to Queued Calls
This message can be played while the caller is waiting to speak to an agent. It is a great way to insert comfort messages like ‘Please continue to hold; your call is important to us.’
Play Position in Queue
This will play a message to the caller to let them know where they are in the queue, such as ‘You are position 3 in the queue.’ This enables the caller to know they are progressing up the queue.
Play Message and Position Before Entering the Queue.
If you already played a message to the caller before they entered the queue, perhaps the call reached the queue from the IVR, or the Number has already played a message. This is an excellent way to inform the caller precisely what is happening within the queue.
Play Message and Position Every
You can select how often a message and queue position is played. We recommend you play a message between 30 to 60 seconds apart. You can choose from 5 to 300 seconds.
Wrap-up Time
This is the time the agent will be unavailable to receive calls. It is to give the agent time to finish the last call or to input information about the call to a CRM. You can make an agent unavailable from 0 (meaning calls will be delivered straight after the last call) up to a 300-second wait time.
Record Queue Events.
This option works with the analytics reporting package and must be set to yes if you want detailed call reporting.
Set Destination Unavailable After Missing
This option will remove an agent and make them unavailable if they have missed a certain number of calls in a row. These calls must be missed consecutively. If this is set to three and the agent misses one call but answers the next, the count starts again. This is a great way to ensure all agents who are not at their desks are logged out. This will speed up the delivery of calls around available agents. You can set this from never (no count applies, and the agents MUST log themselves out) to 100 missed calls.
Allow Call Back On Pressing * (Star Key)
If a caller is held in the queue and this option is set to ‘Yes’, they can be called back and placed back in the queue when they are at position 1. If this option is set, you will need to use a message to tell the caller what to do, or it could be an announcement in the Music On Hold message. This could say, ‘You are held in a queue. If you prefer not to wait and would be happy for us to call you back, then press the star key on your handset, and we will add you back to the queue when you are at position 1’. Remember, the system is making an outbound call so this will be chargeable. The caller will hear instructions about entering their number if they called from a withheld number or if they wish to change it.
When Exiting Queue, Forward To
This works with the options below and will be the destination if any exit queue limits are reached. This would typically be another queue or a voicemail box.
Show in Reception Console
This will allow the queue to be seen in the Reception Console.

Exit Queue When
There are already calls in the Queue
This can be set from no limit (do nothing) to 100 calls. If this is set to 5, the 6th caller entering the queue will send the caller straight to the exit queue, forward to the option above.
Maximum Hold Time is Reached
This will make any calls in the queue longer than the selected period exit to the exit queue, forward to the option above.
No destinations are logged in when entering the queue.
You can choose ‘Yes’ or ‘No’. If ‘Yes’ is selected and all agents are logged out of the exit queue, the forward to option above will be used.

Message to Queued Calls
Sound File to Use.
If you have already uploaded sound files, select one you wish callers to hear. If you don’t have any uploaded to the platform, you can upload a WAV file here, too.
Create your own audio file here.
This option will take you to our TTS (Text-to-speech) service to record a new greeting for you.
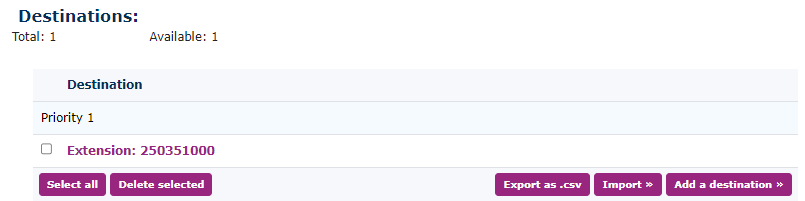
Destinations
You can select the Extensions (agents) you want to be part of the queue. You can choose which level you want the agent to be part of. There are ten levels, one being the lowest and ten being the highest. Calls will be distributed between the agents based on their status when they enter the queue. If agents log out using a feature code, these telephones will not receive calls until they log in again with a feature code. The agents that are logged in will be sent calls based on their level and the time they last received a call. Calls will be delivered to higher-level telephones first, and if these agents are busy, the system will choose the next agent lower down in the levels. The system will calculate which agents have been idle the longest and choose these Extensions to receive the call next. However, if there are agents at higher levels who have answered calls but have now finished calls, the system will still choose these agents over and above the agents who haven’t responded to calls or who are waiting longer to receive calls at lower levels. This allows you to give higher priority to better-skilled agents.

If you click on the telephone extension, you can change its status. This can help the call centre manager maintain and manage their queues.
Available for calls.
This slider switches from available to unavailable.
Priority
You can change the Agents/Telephones priority here.
Other options for this queue are:
Destination Statistics
This report shows a snapshot of the extensions for the period selected. Choose the start and end date of the period you would like to view. It will then show the following information.

Export Events
This will give a detailed report of the agents and their calls. An example here:

Holding Calls
This will show you the current status of calls in the Queue.
Make Copy
This will create a new queue for the current queue you are in. It is a great way to try something different without affecting the existing Queue. You could then revert to the original Queue.
Notes
This free text area allows you to make notes about the Queue.
Queue Statistics
This will show you information about a period you select. It provides call centre managers with crucial information about their Queues.
