
Feature Codes
Feature Codes can be found under Features - Feature Codes.
Feature Codes work similarly to Numbers. You can use Feature Codes to create simple routes to destinations. For example, you can create a Feature Code like ‘200’ and point it to the sales Hunt Group. If a call is received and needs to be transferred back to the sales Hunt Group, it can be done by simply calling the Feature Code. Feature Codes can also enable features such as doDo notNot disturbDisturb on (*78) or DND off (*79). Several default feature codes are fixed within the system; however, some can be overridden by entering new feature codes into the customer's system setup.
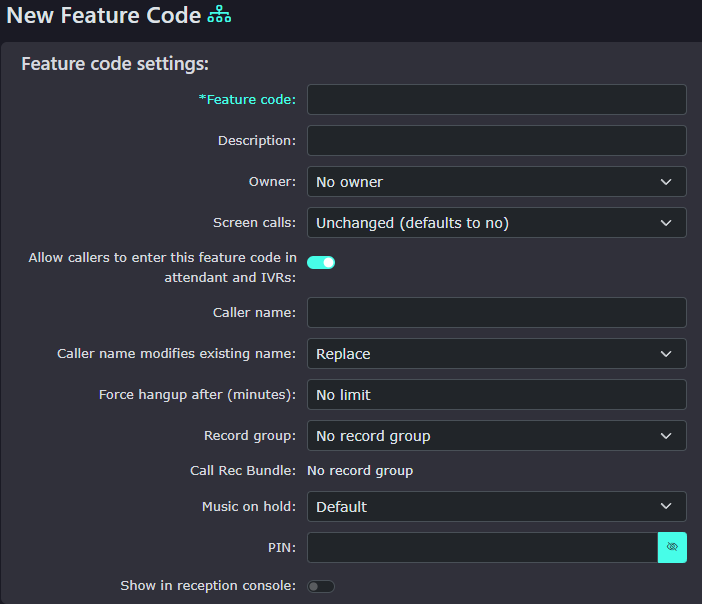
Creating a New Feature Code
| Click ‘New’ on the bottom right-hand side to see the following screen. |
|
|
|
Feature code This is the number you will dial to perform the functionality the feature code creates. |
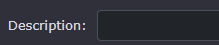
| Description If you need more information about the feature code, you can enter it here, but it isn’t necessary. |
|
|
|
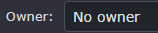
Owner If an owner is added here, then the user who owns the feature code can administer it, as can the system Administrator. |
|
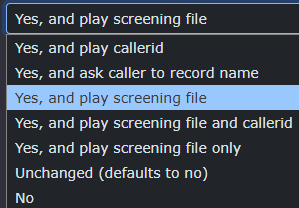
Screen Calls
To answer the call, the person called will need to press 1 to accept the screened call. (except the 5th option).
1, Yes, and play callerid. This will announce the CLI of the calling party. 2, Yes, and ask caller to record name. This will play the caller's name to the dialled party. 3, Yes, and play screening file. This will play the screening message, so you must have this set to see this option. 4, Yes, and play screen message and callerid. Same as option 3, but also plays the caller's CLI. 5, Yes, and play screening file only. This will play the message once answered and deliver the call without the need to press 1. 6, No. This will switch off the screening service.
|
|
|
|
Allow callers to enter this feature code in attendant and IVRs You can choose Yes or No. If set to Yes, anyone who calls in via an IVR can dial this number to be routed to the feature or destination it goes to. You may be allowed to go to a Hunt Group or a Queue, but it is not recommended that you have this option for feature codes like DND or call waiting. |
| Caller name This option shows a name on the handset's screen when receiving calls. A good example would be using a Feature Code after someone chooses an option in an IVR. You could create one that forces the caller name to be accounts and another to move the name to be service. If the call is delivered to the same Hunt Group, the person receiving it will know it is an accounts or service call. |
|
|
|
Caller name modifies the existing name. By default, this is set to replace the name that may have been there before. For example, if the Number had a forced caller name set like ‘web sales’ and then went to a Feature Code, this would replace the name with the two examples above. You can also set it to prepend or append, and it will display both names. Keep in mind the size of a handset screen. |
| Force hangup after (minutes) This will hang up the call after XX number of minutes if set. By default, it is set to no limit. |
|
|
|
Record Group This option will appear if you have already added a record group to the system. You can select the record group to which you would like to add it. |
|
It displays here for information only.
This option will appear if you have already added the feature code to the Call Rec Bundle. If you would like to add it, go to Call Rec Bundles and add the feature code inside the bundle. |
|
|
|
Music on hold
The default music is set within the customer settings. |
|
PIN |
|
|
|
Show in Reception Console This will allow the Feature Code to be seen in the Reception Console. |











Route Calls to
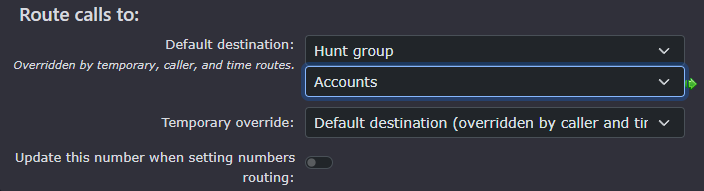
| Default Destination This is the destination of the call when you dial the Feature Code. For example, this could be a Hunt Group or a feature you wish to enable. |
|
|
|
Temporary Override A temporary override can change the routing without affecting the default destination above. The default for this setting is the default destination (overridden by caller and time routes). You also have the default destination (ignore caller and time routes) and, lastly, a Specific number, which then opens a new box below for you to enter this number. |
| Update this Number when Setting the Numbers Routing If you select yes and have a time group active in the below time groups, you can use a Feature Code to switch this time group on and ‘make active’. |
|



AI options
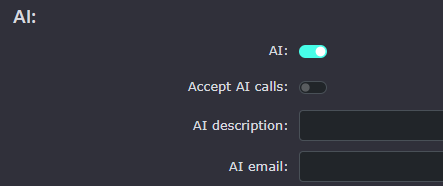
Note: This option will only be available if you have AI agents enabled in the AI section of the portal. It is also important to note that the AI services for feature codes only work with feature codes that are pointed to Hunt groups or queues.
|
AI on/off To enable the AI agent for this feature code, you can toggle the on/off switch. This will make the AI agent aware of the feature code and can use it to identify a department such as sales or Accounts. |
|
|
|
Accept AI calls Enabling this option allows the AI agent to transfer calls to this feature code. As an example, you may want to enable this option for the Sales department so calls can be pushed through via |


Update this Number when Setting the Numbers Routing
If you select yes and have a time group active in the below time groups, you can use a Feature Code to switch this time group on and ‘make active’.

Announcement Message
Sound File to Use
If you have already uploaded sound files, you can select the one you wish callers to hear.
or .wav File to Upload
If you haven’t uploaded any to the platform, you can also upload a WAV file here. This will take you to your PC and ask you to find the file you wish to upload. Once located and selected, hit the save button. Create your own audio file here. This will take you to the text-to-speech service, where you can record new announcements.

Screening message
Sound File to Use
If you have already uploaded sound files, you can select the one you wish the person who called to hear.
or .wav File to Upload
If you haven’t uploaded any to the platform, you can also upload a WAV file here. This will take you to your PC and ask you to find the file you wish to upload. Once located and selected, hit the save button.


Caller Routes
A caller router recognises an incoming CLI (Caller Line Identification) and routes the call to a different or default destination. The number can be a total ten or 11-digit number, or you can do a partial match of a number. If you wanted to route all incoming numbers from the Birmingham area of 0121 to the Midlands district office, you could use this partial match. However, you wanted to route elsewhere if there was a particular Birmingham number. This would take precedence over the partial match entry.
