Provisioning (auto-provisioning using templates)
One of the easiest ways to set up many handsets is to use the auto-provision function built within the platform. This isn’t just used for the one-time setup of the handset but also for administering changes throughout the life of the telephone handset. It also plays a major part in offering clients hot desking. Several handsets are supported either as a fully supported product, like the branded hosted handset and the Yealink range of handsets or partly supported, giving basic provisioning for handsets like the Snom range.
If you look after customers underneath your account and are a reseller, then if you set the default provisioning at your top-level account, it can and will affect all customers underneath you. This is a great way to set the absolute defaults you want to use for you and your customers. Of course, this can be changed on a per-customer and per-telephone basis, too, by going into each customer and changing their default settings or even on each Telephone Account and changing the provisioning settings there.
This function can be found under the ‘Features Advanced’ tab. Then select ‘Provisioning’ if you are on a top-level account.
|
|
||||
| You can change any of the settings, and if your handset supports our auto-provisioning, the above settings will become the default for every customer. | ||||
|
|
||||
|
||||
|
||||
| ||||
|
|
||||
|
Selecting the custom settings under BLF settings ‘BLF Provisioning’ will allow you to add buttons at the bottom of the page. These buttons will auto-populate onto a branded hosted handset and/or MobeX if you use the MobeX web desktop or MobeX+ mobile app. We recommend not showing the BLF idle LED, leaving this set to ‘No', and leaving the monitor with your own extension set to ‘No’. This is because it stops your handset from lighting up with lots of lights and informs you that the handsets are plugged in and ready to receive calls, which in most circumstances are not required. The lights used on a handset to show status are generally red and green. Green shows that the handsets are available in the case above, and red shows that a user is busy. Some people are colourblind, making it impossible to see what is happening with the BLF when this mode is in use. Not selecting to monitor your Extension means it will not populate a button on your handset, freeing up a button to be used for another telephone Extension. |


Drag & Drop Buttons
|
You can click and hold your cursor to drag and create the required layout order.
To rearrange the layout, click on the button's number and either drag it up to move it to a higher position or down to move it to a lower position. |
|

Specific telephone provisioning
|
If you wish to change a particular handset, you can do so under the provisioning section of the telephone extension. Go to features and extensions. Then, select the telephone extension you would like to adjust.
Go to the bottom of the page to see other options for this Extension. |
|
|
|
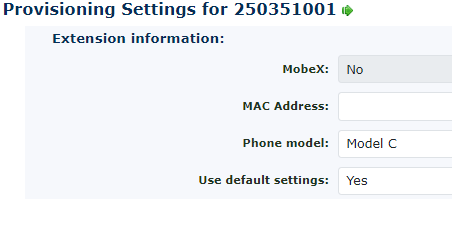
Select the provisioning settings, and then the screen will display the example here on the left: |
|
If you haven’t entered the handset's MAC code, you should do this now, as this will open up some more options depending on the handset type. Again, if you are using a branded hosted handset, it will automatically calculate what handset you use and match the name. |
|
|
|
From here, you can copy settings from another handset, copy the default settings to get you started, or completely customise this Telephone extension. |
|
There is now a facility to test whether the handsets connect and communicate through the customer's firewall. The test could help identify if the firewall is too restrictive and blocking some of the ports required to operate a VoIP handset on their network |
|