
Numbers - Advanced Settings
Setting up public phone numbers so that anyone worldwide can contact you is a perfect way to stay connected to the outside world. Don’t forget, you can also port numbers into the platform from other providers, to keep customers' existing numbers. You can add as many numbers as you wish and this can helpful by using different numbers to track advertising campaigns, or allow customers to ring different numbers to go to different departments within a business. Numbers can be pointed to any routable service within the platform like Telephone Lines, Hunt Groups or IVR’s.
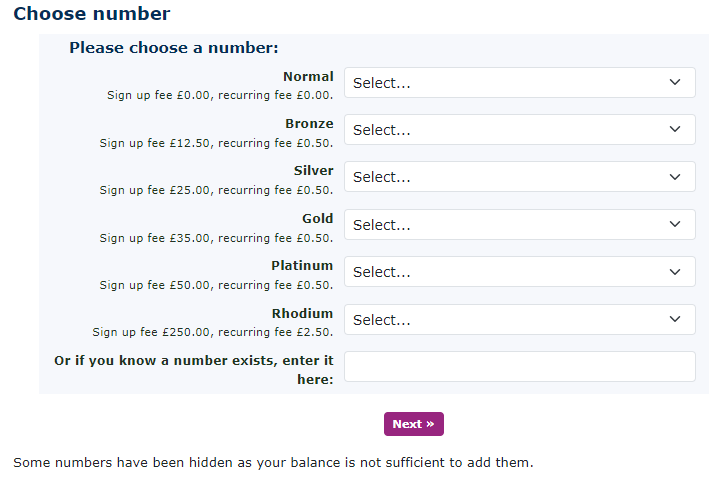
To add a number, go to Features - Numbers in the menu. Once you are in the numbering menu press ‘New’. Choose a number either via the area code name or by the area code itself. Once selected you will be offered a list of numbers available for that area. Depending on how memorable the number is will depend on the cost of the number. The better the number the higher the cost.


Number Settings
Description
Add a description to help identify what the number is being used for.
Owner
If an owner is added here then a user that owns the number can administer it as well as the system Administrator.
Include in Directory
This tab is no longer used.
Screen Calls
If this is enabled, it will play the CLI of the number calling you and a message if you set a call screening message below. The destination will need to press 1 to accept the call. This is great if the number is going off-network to a mobile for example. This would give the receiving party more information about the call before they answer.
Allow Callers to Enter this Number in Attendant and IVRs
You can choose ‘Yes’ or ‘No’. The default is ‘No’. If set to ‘Yes’ it will allow callers who call via an IVR, or the auto attendant, the ability to dial this number.
Force Caller ID
When left on Original this will show the incoming caller's number. If you want to show the number they have called instead, or even a different number within your system set up. You can force the change here.
Caller Name
This is a useful box to complete. This will allow the Telephone handsets to display a name instead of the number that has been called. So this could be labelled as Main, Sales Line, or Internet Enquiry as an example.
Caller Name Modifies Existing Name
You can set this to replace, prepend, or append the number called.
Force Hangup After (Minutes)
This option can be set to force the caller to hangup after the number of minutes is set here. The default is set to no limit.
Record Group
If you have already added a Record Group to the system, then this option will appear. You can select what Record Group you would like to add the number to.
Call Rec Bundle
If you have a call recording bundle set up and this number has been allocated to the group, it will show here
Music On Hold
Here you can select a different type of Music On Hold (MOH) for the caller to hear. This is a great way of playing the caller information or perhaps an advert about the company or products.
PIN
Is used to control access when making changes to the number over the telephone.
PIN Repeat
To confirm the above number is correct.
Show in Reception Console
This will allow the Queue to be seen in the Reception Console that is under the option at the top of the systems menu.

Route Calls to
Default Destination
This is the destination of the call when you dial the number. This would normally be something like a Hunt Group, Queue, or IVR.
Temporary Override
This is the destination of the call when number routing is activated or a temporary forward is enabled. This would normally be a different destination to the default destination.
Update this Number when Setting Numbers Routing
If you select yes, and you have a time group active in the below time groups, then it is possible to use a Feature Code to switch this time group on and ‘make active’.

Announcement Message
Sound File to Use
If you have already uploaded sound files you can select the one you wish callers to hear.
or .wav File to Upload
If you don’t have any uploaded to the platform, then you can upload a WAV file here too. This will take you to your PC and ask you to find the file you wish to upload. Once located and selected, hit the save button. Create your own audio file here This will take you to the Text to speech service where you can record new announcements.

Screening message
Sound File to Use
If you have already uploaded sound files you can select the one you wish the person who called to hear.
or .wav File to Upload
If you don’t have any uploaded to the platform, then you can upload a WAV file here too. This will take you to your PC and ask you to find the file you wish to upload. Once located and selected, hit the save button.


Caller Routes
A caller router is used to recognize an incoming CLI (Caller Line Identification), and route the call to a different destination or to the default destination. The number can be a full 10 or 11 digit number, or you can do a partial match of a number. If you wanted to route all incoming numbers from the Birmingham area of 0121 to the Midlands district office, you could by using this partial match. However, if there was a particular Birmingham number you wanted to route elsewhere. This would take precedence over the partial match entry.

Time Routes
Time routes are used to route calls at different times of the day, or in some cases used for the manual switching of routes using one of the options above. For details on setting up time groups, please refer to the Time Groups Section.
When you add a new time group with the new destination any calls will forward to during that time.

|
At the bottom right, you will see the other options for this number. Emergency address This must be completed and can be clicked here to switch to complete the details as below. Please note that if you have extensions operating from more than one location, it is important they each location that has fixed handsets should have there own emergency number and address set up.
|
|

|
|
Emergency address You must complete the emergency address as this is the information that is sent to emergency services when anyone dials 999 or 112. If you have completed their details already on the customer's page you can ‘use this address’. This is mandatory. |

|
|
Make copy This will copy the setting you have created for this current number to as new number. You will be required to pick a new number as part of the copy process. Notes You may wish to keep some details about this number, they can be kept under 'notes' here. |
