
Conferencing


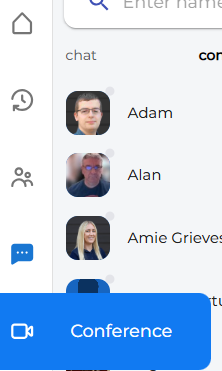
Clicking the Conference tab will open a new browser tab and take you to the Conference settings.


image.png
image.png This will open a new webpage tab and display three conference options.
Additionally, you will see a box on the right, indicating that you have no scheduled meetings (unless someone has already invited you to a meeting). image.png


Create a new conference.
Click on the ‘New’ box to create your conference room. image.png

You are given the meeting code and the URL for the meeting room, which you can copy and share to invite participants.


Click “Create Room” followed by “Join” to complete and create the meeting.

image.png

image.png

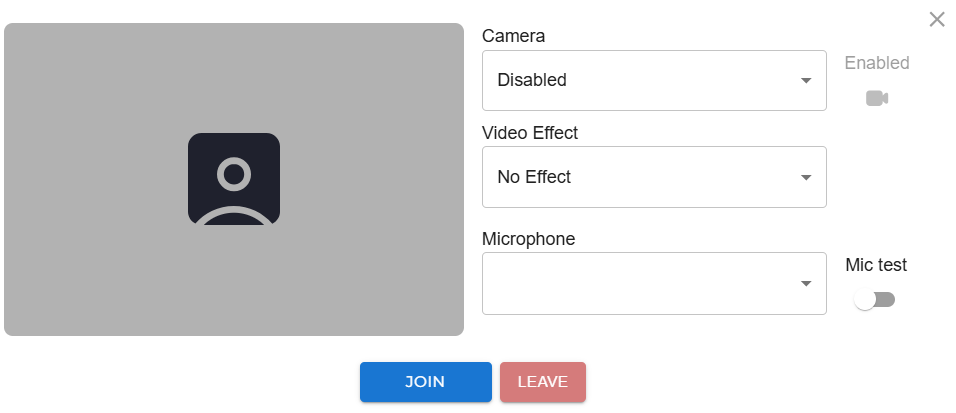
It will then take you to the meeting's Camera and Audio settings. Clicking "Join" will allow you to join the meeting, and clicking "Leave" will take you back to the main conference page and exit the current conference. If your camera doesn't appear, you can change it here before entering the meeting.


You can also test your microphone using the echo test. You should hear yourself.

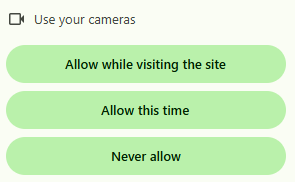
If this is the first time of using the conference service. Your computer may need to grant permissions to allow the webpage yo utilise your camera. Please click 'Allow while visiting the site' This way, you don't need to give permission continually. You may need to do the same for the microphone.

image.png


Once all is completed, you will join the conference room. image.png


Conference icons & what they do

image.png    Raise your hand.

image.png  Click again to lower the hand

image.png Chat within the meeting.

image.png

image.png See the list of participants and the meeting room.


Additionally, the conference link URL is provided, in case you want to share it with someone.

image.png

image.png Copy the meeting room link.

image.png Changes your view of participants.

image.png Camera on

image.png Camera off

image.png Present your screen. Choose what you would like to show (Tab, Window or Entire screen).


image.png

Leave meeting

image.png  image.png

  Mute on/off

Conference settings

image.png

Meeting Settings - When you click the settings icon during a meeting, you'll be presented with this screen.

image.png


image.png

It is reserved for future development.

Change the layout of your screen.

image.png

image.png

You have the option to adjust the maximum number of participants visible on your screen, which can be particularly helpful if you need to reduce bandwidth. The default view displays up to eight participants, but you can reduce it to as little as two.

image.png

image.png

You can choose to blur your background image or upload a background image by selecting the upload image option.

It may or may not be available, depending on your version number.

image.png

image.png

It allows you to adjust your microphone and Speakers.

Switching this on will apply electronic noise reduction.

image.png

image.png

Switching this on will apply electronic echo cancelling using the PC processor.

Switching this on will apply electronic auto volume control over your microphone and speakers.

image.png

image.png

The video option allows you to choose your camera and change its quality. It will depend on what your camera offers, but most modern cameras have a range of quality settings.

image.png

image.png


Your bandwidth will be set to 256 kbit per second by default, allowing multiple users to access the same conference. You can increase this to 2mbits or even set it to unlimited. The default should be good enough quality for most conference needs.

This is reserved for future development.

image.png


Scheduling a conference


image.png

Pressing the Schedule button will bring up the following screen.

Give your scheduled conference a name. The name will appear in the email invite sent to participants. 

image.png


Select the date you would like the meeting to be held on.

image.png

image.png

image.png

image.png

Using the dropdown menu, you can choose if you want the conference to be a private or public meeting. 


Private access: This will only allow access to invited guests. They will need to log in with their email addresses. 


Public access: Will allow anyone with the link to log in.

In the Notes section, you can include a message that will be displayed in the body of the email sent to the participant(s).


image.png

You can choose to repeat the conference or leave it to no repeat.

At this point, you can either schedule a conference or continue to add users. Remember, if you set the conference to a private conference, you must invite users.


You can use the search box to find users in the list or click the + plus icon to add the users you want to join.

image.png

image.png

If you haven’t added any users or want to add more to the conference, you have already created, click ‘invite’ and add the users.

image.png

image.png

As the event creator, you will receive a confirmation email to confirm the creation of your new conference.

When someone is invited, they will be notified by email, providing details about the conference invitation.

image.png

Joining a conference


There are many ways you can join a conference.

image.png

image.png

Enter the Room code and click Join

image.png

image.png


On the conference page, any upcoming conferences will be displayed. Click on the three dots to expand the meeting details, and then select ‘Join now’ to participate.


You can join if you have the web link or it has been sent to you. Provided it is a public conference, you can simply paste the link into a browser and enter.

https://phone..sip2sip.net/conference/4Xj6AZQbnx5rb

image.png

Click the link in the email invite that you are sent.

image.png

image.png


Or, in your calendar, you can open the meeting by clicking on Join MobeX Conference within the meeting invitation.