
Cloud Phonebook
Cloud Phonebook can be found under the Feature Advanced tab.
| First, you need to activate the Cloud Phonebook here. |
|

Once enabled, you can enter the numbers you wish to store in the cloud phonebook. This service uses a function called LDAP, so if you are trying to get this function working with a device not currently supported via provisioning for the cloud phonebook, like the hosted handsets available from your supplier or the Yealink branded handsets. Then, you will need to enter some details into each handset manually. See the other options on the right to see the settings.

|
Click new and enter the details in the box presented to you.
You can enter up to 3 telephone numbers per contact. It is not essential to enter all 3. Click save once completed. |
|

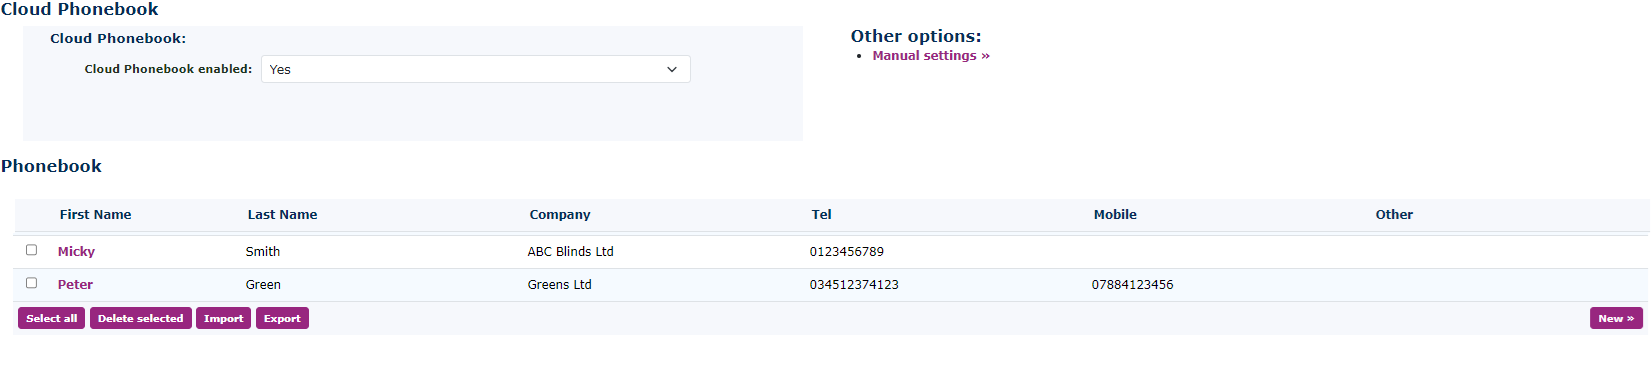
Once you have entered all your numbers, you can see and edit them on the main page. You can enter a maximum of 10,000 entries in the cloud phonebook. You can also import and export larger groups of numbers. The best way to get the right format is to manually enter one number, export it, and use this as the template for the import file.
|
If you need to enter the details into a handset manually, click manual settings on the right side.
(do not use these settings; this is an example) |
|

Please remember that if you disable and then enable a new cloud phonebook, this will give new credentials, and therefore, you will need to enter them manually in each handset again. However, if you are lucky enough to have a hosted branded handset, then this will auto-reprovision with a simple reboot of the handset
To use the cloud phonebook on a handset, simply press the DIR button on the handset and it will display the first available entries. Use the up and down keys to scroll or type the name using the letters on the dialpad. Once you see your entry appear, use the scroll keys to highlight the one you want. Press OK, press Dial and use the scroll keys again to get to the desired number. Finally, press OK to dial out.